
Quick picks
How do I read the advice on this page?
Basically, three kinds of statements show up here, and I keep them apart.
- Safety information comes from a government or medical body, and I link that body's page right next to the statement. The CDC (the US Centers for Disease Control and Prevention), the National Park Service (NPS) and the National Weather Service (NWS) are the three I use most.
- My suggested steps are the order of the nine stages, the mile steps in Stages 1 to 3 and the "you're ready when" checks at every stage. I call this the ladder. No safety body publishes it, so the ladder is my suggestion, not a safety rule and not medical advice.
- Opinion is a gear maker's view, a guide company's view or mine, and I say so when it is.
Now keep in mind that nobody can promise you will reach any summit. Every stage here is worth finishing on its own, and stopping at any of them is a finish.
What should I do before I start any stage?
So there are four habits and one health step that apply from the very first hike.
- Check with a doctor if you have a health condition. The CDC's high altitude page says to see a doctor before going high if you have a condition such as coronary artery disease, long-term lung disease, obstructive sleep apnea or sickle cell trait. The CDC says that applies even when the condition is well controlled. I repeat this under Stage 4.
- Walk regularly. The CDC says adults need 150 minutes a week of moderate activity, such as brisk walking. It also says to strengthen your muscles on 2 or more days a week. Both are on its adult activity guidelines page (dated December 20, 2023).
- Tell someone where you are going and when you will be back. The NPS says so on its Ten Essentials page. The NPS also says to carry a paper map as a backup.
- Learn the Ten Essentials. The NPS lists ten kinds of things to carry: navigation, sun protection, extra clothing, illumination (a light), first-aid supplies, fire, repair kit and tools, nutrition, hydration (water) and emergency shelter. In my view, you build up your Ten Essentials kit as the hikes get longer.
- Pick a turn-around time before you leave. A turn-around time is the clock time when you head down even if you have not reached the top. The NWS says to plan climbs and descents for the morning. It also says to set turn-around times that get you off exposed ground before storms form. Both are on its lightning safety page. The NWS also says lightning can strike several miles from the storm's rain, and that no outdoor place is fully safe when lightning is around. If you are above timberline, the height where trees stop growing, and you hear thunder, the NWS says to go quickly below timberline. The NWS pages don't give one clock time for every mountain, so check the local forecast and pick a time for the day.
What are the stages, in order?
So this order is my suggested ladder, not a safety rule. Each stage builds on the one before it, and you can stop at any of them.
| Stage | What you do | Where the details are |
|---|---|---|
| 1. One-mile hike | A short, flat loop on a marked trail. | This page. |
| 2. Five-mile hike | About 5 miles with a few hundred feet of climbing. | This page, plus boots, shoes or trail runners and heel blisters. |
| 3. Ten-mile hike | About 10 miles with real climbing and a loaded daypack. | This page, plus knee pain going downhill. |
| 4. Elevation | Long climbing days, then time at altitude. | Building up to big elevation days, being out of breath uphill and altitude sickness. |
| 5. Overnight trips | One night out, then two, with a heavier pack. | This page, plus how to layer for a mountain. |
| 6. First walk-up peaks | A summit with no rope and no crampons in summer. | This page. |
| 7. Snow and glacier skills | A course in crampons, ice axe and rope work. | This page. |
| 8. Guided bigger peaks | Mount Rainier, then Kilimanjaro and beyond, usually with a guide company. | Kilimanjaro vs Everest Base Camp. |
| 9. Everest | The far end of the path. | What it costs to climb Everest. |
Stage 1: How do I take my first one-mile hike?
So this is the easiest stage on purpose. Basically, you are proving to yourself that a trail is something you can do, and nothing more.
- What to do: Pick a short loop on a busy, marked trail with almost no climbing. Bring water. I'd go a few times a week.
- What to train: Walking is the training. The CDC's 150 minutes a week of moderate activity, such as brisk walking, linked above, is the base to aim for.
- What to own: The running shoes you already have are fine for this stage, in my view. You also need a small bag, water, and a phone with an offline map, which is a map saved on your phone so it works without signal.
- You're ready for Stage 2 when you finish the mile feeling you could do more, and your legs and feet feel fine the next day. That check is my own suggestion, not a safety rule.
Stage 2: How do I build up to a five-mile hike?
Now the five-mile hike is where you add a little each week until the distance feels steady.
- What to do: Build up to about 5 miles with a few hundred feet of climbing. Elevation gain, which is the total feet you climb on a hike, matters more than miles in my view, so read the trail's gain before you pick it.
- A point of comparison: The site 14ers.com lists the easiest Colorado 14er walk-ups. Mt. Sherman is 5.25 miles round trip with 2,100 feet of gain. Handies is 5.75 miles with 2,500 feet. So a five-mile day with that much climbing is a much bigger day than a flat five miles.
- What to own: A daypack, which is a small backpack, and the start of your Ten Essentials. Trail runners or boots become worth it here if blisters or rough ground are a problem. My guide on hiking boots vs hiking shoes vs trail runners covers the choice, and my guide to stopping heel blisters covers sore heels.
- You're ready for Stage 3 when 5 miles feels steady instead of a struggle, and you can do it two weekends in a row. That check is my own suggestion.
Keep in mind that the mile steps in Stages 1 to 3 are my suggested ladder. No safety body says how far you should hike in your first month.
Stage 3: How do I get to a ten-mile hike?
- What to do: Hike about 10 miles with real climbing. Carry a pack that holds your Ten Essentials, food and an extra layer.
- What to train: Add distance a little at a time, and practice your turn-around time. The weather steps are in the "before you start" list above.
- What to own: A headlamp, in case the day runs long. Trekking poles are worth trying if your knees hurt on the way down, and my guide to knee pain going downhill goes through it. The gear section has specific picks.
- You're ready for Stage 4 when 10 miles feels like a long day and not a risky one, and you know your own turn-around time. That check is my own suggestion.
Stage 4: How do I handle elevation?
Now two different things are called elevation, and mixing them up causes trouble. Climbing is the feet you gain in a day. Altitude is how high above sea level you sleep and spend time. My guide to building up to big elevation days covers climbing. My guide to altitude sickness covers altitude. And if hills leave you gasping, my guide on why you're so out of breath hiking uphill is the one to read.
What counts as a big climbing day?
- 14ers.com lists Mt. Elbert in Colorado at 4,500 feet of gain and 9.75 miles round trip. The same site says routes with more than 4,000 feet of gain need good conditioning.
- The US Forest Service says the Mount Whitney Trail is 22 miles round trip. It gains over 6,200 feet from Whitney Portal at 8,300 feet. The Forest Service says to plan 12 to 14 hours and be ready to hike in the dark.
- Mount Whitney needs a permit. The lottery application runs February 1 to March 1 and results come March 15. A winning permit costs $15 per person, checked October 16, 2026. From May 1 to November 1, the Forest Service allows 100 day hikers and 60 overnight hikers a day. So for a 2027 hike, you would apply between February 1 and March 1, 2027.
- The Forest Service also says to expect snow and ice on the Whitney Trail until early July. When snow or ice is there, it says you need winter mountaineering skills and gear.
What does the CDC say about altitude?
These points come from the CDC's Yellow Book chapter on high altitude travel and altitude illness (dated April 23, 2025). Altitude sickness is illness that can hit when you go up high, and the CDC's advice is to avoid going too high too fast.
- Risk starts at a sleeping altitude of about 8,000 feet (2,450 meters), and sometimes lower.
- Don't go from below 4,000 feet straight to sleeping above 9,000 feet in one day.
- Above 9,800 feet (3,000 meters), raise your sleeping altitude by no more than about 1,600 to 1,650 feet (500 meters) a day. The CDC page gives both numbers. Add an extra night for every 3,300 feet (1,000 meters) you gain.
- The main sign is a headache, usually with at least one of these: tiredness, dizziness, nausea or loss of appetite.
- Never go higher to sleep while you have symptoms. If symptoms get worse despite rest at the same height, go down. The CDC says altitude sickness improves quickly when you go down 1,000 feet (300 meters) or more.
- Confusion, loss of balance or drowsiness are signs of brain swelling at altitude. Being out of breath while resting, often with bloody spit, is a sign of fluid in the lungs. For these, the CDC says going down is urgent and a must in most cases.
- See a doctor who knows altitude medicine before you go high if you have one of the conditions the CDC names. Those include coronary artery disease, long-term lung disease, obstructive sleep apnea and sickle cell trait.
My altitude sickness guide goes deeper on the warning signs and when to go down.
- You're ready for Stage 5 when you have done one long day of 4,000 feet of gain or more and recovered well. You have also slept a night at moderate altitude without any of the warning signs above. That check is my own suggestion.
Stage 5: How do I start camping overnight?
- What to do: Spend one night out near a trailhead, which is where a trail starts. Then try two nights. Learn to camp, cook, treat water and stay warm.
- What to train: Carry a loaded pack up hills. The guide company RMI Expeditions says its Mount Rainier climbers carry 35 to 60 pounds. It suggests hikes or runs of 4 to 6 hours with at least 3,000 feet of gain. It says to work up to a 40 to 60 pound pack (page published February 28, 2025). That is where this stage ends, not where it starts.
- What to own: A tent or shelter, a sleeping bag and pad, a stove, a way to treat water and a bigger pack. The Ten Essentials still apply. My guide to how to layer for a mountain covers clothing.
- You're ready for Stage 6 when you can sleep out, stay warm and eat well, and a long carry with weight does not wreck you. That check is my own suggestion.
Keep in mind that this page covers the plan and the Ten Essentials for overnight trips. It doesn't cover how to treat water or how to stay safe on cold nights.
Stage 6: How do I climb my first real peak?
So a non-technical peak is a walk-up, with no rope and no crampons in summer. Crampons are metal spikes that strap onto boots for snow and ice. The easiest Colorado 14ers on 14ers.com run from 5.25 to 13.5 miles round trip. The same site says easy doesn't mean safe or effortless, and that every 14er needs good fitness, an early start, the right gear and close attention to the weather.
- What to do: Climb a walk-up peak with a clear route, early in the day, with a turn-around time set.
- The step in between: Scrambling means using your hands on rock. The Mountaineers club's Seattle scrambling course was listed for 2026 at $475 for members and $515 for guests, checked October 16, 2026. Registration for the 2026 course closed on January 30. If you don't have the club's navigation badge, you must take its wilderness navigation course at the same time.
- What to own: Boots or trail runners you trust on rock, trekking poles, a headlamp, and gloves, a hat and a shell jacket for the summit.
- You're ready for Stage 7 when you have summited more than one walk-up peak. You have also turned back at least once on purpose when the weather said to, and you handled exposed rock without freezing up. That check is my own suggestion.
Stage 7: How do I learn snow and glacier skills?
Now the path changes here. Rock and dirt become snow and ice, and in my view reading a book isn't enough to learn snow and ice skills. RMI says every route on Mount Rainier involves glacier travel with crampons, an ice axe, a rope and the risk of crevasses. A course teaches glacier travel, rope work, crampon and ice-axe use, crevasse rescue and snow camping. A crevasse is a deep crack in a glacier. Self-arrest means stopping yourself with an ice axe after a slide on snow.
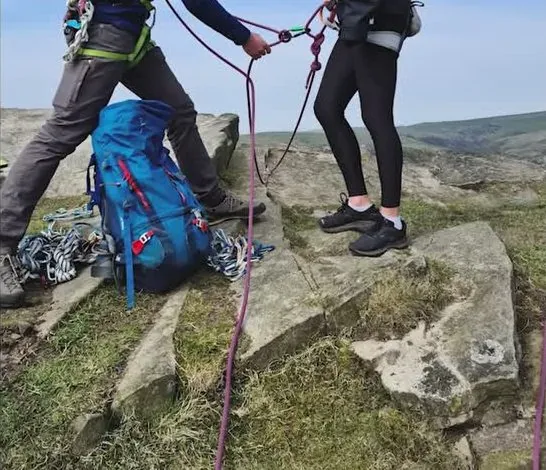
Two people sort out a rope on a rocky hilltop, cropped to show the rope, the harness and the gear on the ground. The courses below teach rope handling like this. Screen from Train to Summit's video.
What do courses and training plans cost?
So these are the courses and plans worth knowing, from each school's own listing. All prices were checked October 16, 2026, and they change, so check the linked page.
| Course or plan | Price, checked October 16, 2026 | What it is |
|---|---|---|
| RMI Mountaineering Day School | $445 | A one-day school for novices, from RMI Expeditions. |
| RMI Crevasse Rescue School | $445 | A school in crevasse rescue, from RMI Expeditions. |
| American Alpine Institute Seven Summits Training Course | Phase 1 $2,445, Phase 2 $2,880, Phase 3 $2,820 | Phase 1 teaches general mountaineering skills in the North Cascades. |
| The Mountaineers Intensive Basic Alpine Climbing Course, Seattle | $1,320 for members and $1,450 for guests for 2026 | A 9-day version of the club's 6-month Basic Alpine Climbing Course, held May 30 to June 7, 2026. Registration closed May 29. It's for people already comfortable with hiking and backpacking, and it teaches rope handling, rock climbing, and snow and glacier travel. Wilderness first aid and navigation are separate courses with their own costs. |
| Uphill Athlete 8-week Beginner Mountain Fitness plan | $49, paid once | 49 workouts for 1 to 3 day trips on easier peaks around 14,000 feet, such as Mt. Baker or the Colorado 14ers. The maker also sells 12 and 16 week plans for Rainier or Mont Blanc. |
Should I take a course or join a club first?
Now the mountaineer in the first video below says an alpine club gives you partners, courses and insurance. He says to take a 5-day course first, practice, then join a club. That is his opinion, and I agree with the order, because a course shows you the basics before you trust partners with a rope.
And the gear maker Mammut's beginner guide (June 2024) puts a climbing gym at step 2. For me personally, a gym helps with ropes and knots but isn't needed to start. Both Mammut and the guide operator Life Happens Outdoors (published May 15, 2025, updated August 24, 2026) say to rent gear before you buy it.
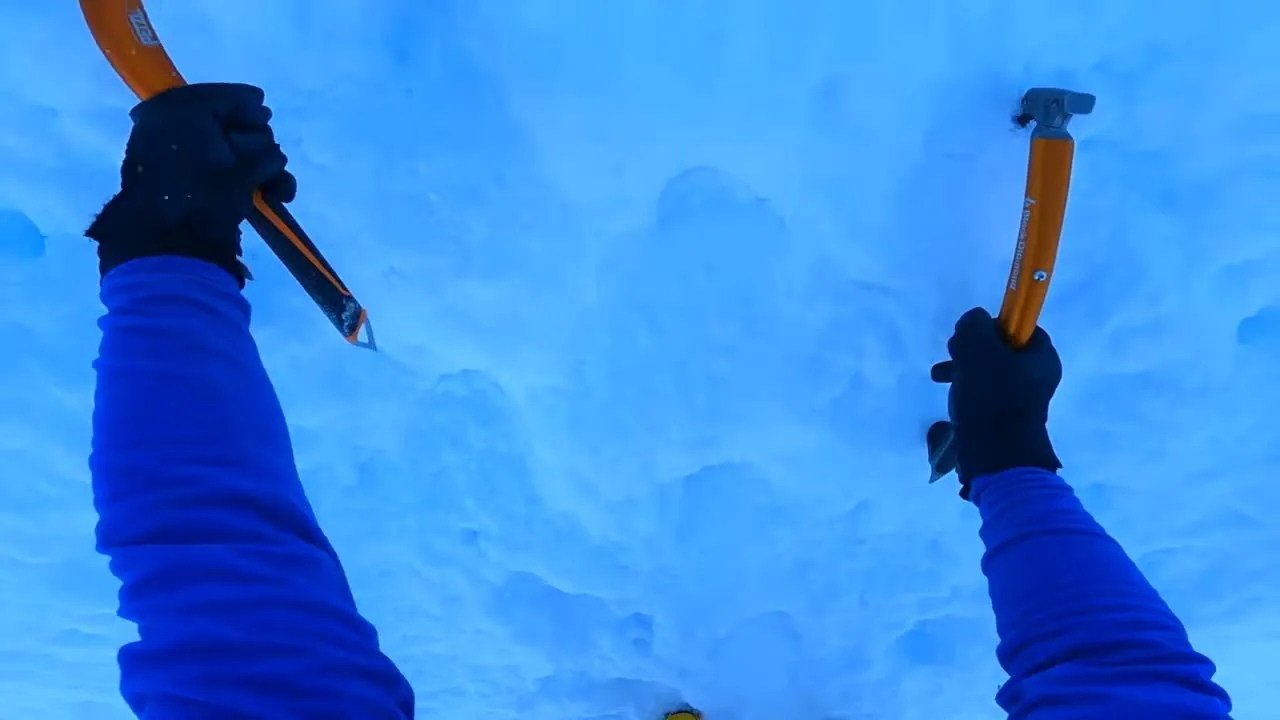
A first-person view of two ice axes planted in snow, with a gloved hand on each. The axes are the tool that self-arrest skills depend on. Screen from Chad Lubinski's video.
- What to own: Rent crampons, an ice axe and mountaineering boots from the course at first. The gear section shows what each costs if you decide to buy.
- You're ready for Stage 8 when you can tie your knots, self-arrest, put on crampons and rope up without thinking, and you have practiced since the course. That check is my own suggestion.
Stage 8: How do I move up to guided bigger peaks?
So a guided climb means a guide company leads you up a mountain you couldn't safely do alone yet. Mount Rainier (14,410 feet) in Washington is the first example I use.
What do the National Park Service and a guide company each say about Mount Rainier?
The NPS says on its Mount Rainier climbing page that routes gain more than 9,000 feet and run over ten miles. It says climbers must be in excellent physical condition and well prepared, and that technical glacier rope skills are required. For people who want to climb without a guide, it suggests first building experience on heavily glaciated peaks like Mount Baker, Denali or Mont Blanc. Climbing registration is $82 per person, checked October 16, 2026. From May 1 to September 15 there is also a wilderness permit at $12 per person per night. The park names three main guide companies for Rainier, including RMI, and it allows 15 more guide services for single trips.
And RMI says its standard summit climbs need no prior experience and include a day of mountaineering school. RMI also says the summit push often takes 8 to 12 or more hours. Its four-day climb is listed at $2,595 to $2,995 and the five-day at $3,095 to $3,595 on its Mount Rainier page, checked October 16, 2026.
So both are true. A guided climb teaches the rope skills on the climb. But the fitness is yours to bring, and the NPS says the same.
What do the next steps cost?
These are one company's list prices, not typical prices. The American Alpine Institute's Seven Summits page lists Kilimanjaro at $4,950 (climb only), Elbrus from $6,000, Aconcagua at $7,150 and Denali at $12,650, checked October 16, 2026. It says Denali needs solid snow and ice skills and recommends Phases 1 and 2 of its training course or the equivalent. It also says a few people finish all seven summits in a year or two, but most take longer. My guide on Kilimanjaro vs Everest Base Camp helps you pick between those two trips.
- You're ready for the next step when you have done the skills course, trained with a heavy pack, and a guide company's own requirements say you fit the trip. That check is my own suggestion.
Stage 9: What about Everest?
So Everest is the far end of the path. Nobody can promise anyone will reach the top of Everest, and the altitude alone is serious, as the CDC points above show. The American Alpine Institute lists its Everest South Col trip at $83,000, checked October 16, 2026. My guide on what it costs to climb Everest and where the money goes goes through the rest.
What gear do I need at each stage, and what should I rent?
Now gear should grow with you. Own what you already have for as long as it works, upgrade when something stops you, and rent the expensive snow gear first. Prices were checked October 16, 2026, and they change, so check the linked page. Where a price comes from reviews and not a store, I say so.
| Stage | You probably already own | When to upgrade, and why |
|---|---|---|
| 1 to 2 | Running shoes, a small bag, a water bottle, a phone. | Get trail runners or hiking boots when blisters or rough ground bother you. My boots, shoes and trail runners guide compares the options. |
| 2 to 3 | Any small pack you have. | Get a daypack when your small pack can't hold the Ten Essentials, food and an extra layer. I don't give daypack picks on this page. |
| 3 | A phone flashlight. | Get a headlamp before any hike that could run past dark. A headlamp leaves both hands free. |
| 3 to 6 | Nothing, or borrowed poles. | Get trekking poles if your knees hurt going down. |
| 6 to 7 | Nothing. | Get a climbing helmet for scrambles and glacier travel, where rock can fall. |
| 7 | Nothing. | Rent crampons, an ice axe, boots, a harness and snow gear from the course first. Buy after you know what you like. |
Which exact products are worth knowing about?
| Item | Pick | Price, checked October 16, 2026 | Weight or key spec | What it's good and bad at |
|---|---|---|---|---|
| Headlamp, budget | Petzl Tikkina | $19.95, out of stock on Petzl's US page that day | 92 g (grams) | Petzl's own figures. The Tikkina is the cheapest headlamp here, but Petzl's US store had it out of stock. |
| Headlamp, alternative | Black Diamond Spot | $59.95 at REI | 2.65 oz with batteries, 450 lumens, IPX7 water rating | REI's figures. IPX7 means REI says it works up to 1 meter underwater for 30 minutes. REI now lists this 450-lumen Spot, and its old Spot 400 link goes to a list of Black Diamond headlamps. |
| Headlamp, step-up | Petzl Actik Core | $87.95 | 88 g | Petzl's own figures. The Actik Core costs more than the Tikkina, weighs a little less and was in stock. |
| Trekking poles | Black Diamond Trail Ergo Cork | About $140, from the CleverHiker and The Big Outside reviews. Black Diamond's US store doesn't list the full pair, so the link is its search for the name. | Aluminum, telescoping, 18 oz per pair | Reviewed by OutdoorGearLab and CleverHiker. OutdoorGearLab calls the Trail Ergo Cork heavier than most poles. If you are not sure about poles, borrow a pair first. |
| Helmet | Petzl Meteor | $114.95 | 235 g in S/M or 245 g in M/L, fits 52 to 59 cm or 57 to 61 cm | OutdoorGearLab says it costs less than other top helmets and is near the lightest. Owners on Mountain Project report the sizing runs small, so M/L is often needed. |
| Helmet, alternative | Black Diamond Vapor | $149.95 at REI | 5.5 oz in S/M or 6.4 oz in M/L, per REI | Lighter than the Meteor, but owners in forums report the foam cracking. |
| Ice axe | Black Diamond Raven | $139.95 at REI | 55 to 75 cm. REI lists 15.7 oz for 60 cm up to 1 lb 1.4 oz for 75 cm. | REI's figures. The Raven costs less than the Petzl Summit. Rent first, as two guides advise. |
| Ice axe, step-up | Petzl Summit | $164.95 | 52, 59 or 66 cm, 360 to 400 g by length | Petzl's own figures. The Summit is lighter than the Raven. |
| Crampons | Petzl Vasak | $209.95, out of stock on Petzl's US page that day | 12 points, 845 to 895 g, sizes 36 to 50. The Leverlock Universel version needs boots with a heel welt, which is a ledge on the back of the boot that the crampon clips onto. | Petzl's own figures. Rent first. The climber in the second video below says universal bindings are cheaper but most people eventually want semi-automatic ones. That is his opinion. |
| Mountaineering boots | La Sportiva Nepal EVO GTX | $599 | Full shank, which means stiff from heel to toe | OutdoorGearLab calls the Nepal EVO GTX reliable and heavy, and stiffer to walk in. Switchback Travel and Outdoor Life lean toward lighter boots for beginners. Rent first. |
For harnesses, gloves, gaiters and snow gear, Mammut and Life Happens Outdoors both say to rent before you buy, and I don't give picks here.
Do I have to keep going to the next stage?
No. Basically, each stage is a full outing by itself. Some people stop at the ten-mile hike, some at walk-up peaks in their own state, and some keep going to guided mountains. I'd say stopping where you're happy is a real finish, and stopping at any stage isn't a failure.
Videos worth watching about starting mountaineering
And if you want to see more, here are two videos. You can play each one right here on the page, and YouTube's usual controls work, including skipping ahead, changing the speed and going full screen. Under each video is a short summary so you can decide if it's worth your time.
A mountaineer explains three ways to learn the sport, in the order a beginner meets them.
- Teaching yourself: He says he has mountaineered for 10 years without an official course. He says this is the hardest way, and he hit a ceiling on glaciers and steep rock.
- Course, then club: He calls this the old way of learning from experienced people. He says to check your partners before a technical route, and to start on an easier mountain with someone new.
- Just hire a guide: He says a guide gets you up one summit but doesn't make you a mountaineer.
- His advice: Take a 5-day course, practice, join a club, go independent on small safe trips, and hire a guide for goals beyond your skills.
- Worth knowing: This is the opinion of one climber, not a safety source.
A Cascades climber goes through the five core items for a first snow climb.
- The five items: Crampons, an ice axe, boots, a helmet and a harness.
- The ice axe: He says an ice axe is mainly for self-arrest. A long straight axe is a common first pick, and a curved one suits steeper terrain.
- Boots and crampons: He compares three-quarter-shank and full-shank boots. He says universal crampons are cheaper but he would upgrade to semi-automatic ones.
- A mistake: He says he wore snowboard boots on his first Mount Hood climb and calls it a rookie move.
- Worth knowing: This is one climber's opinion from 2023, so I don't repeat any prices from it.
What's next?
So the next page on the path is how to build up from short hikes to big elevation days. That's where Stage 4 starts, with how to build from shorter hikes up to big climbing days. If boots are your worry, read hiking boots vs hiking shoes vs trail runners first.
My take
So ultimately, start with a one-mile hike in the shoes you own, and don't buy anything yet. Add distance, then climbing, then weight and nights out, and move to the next stage when the stage you're on feels steady.
But for me personally, I'd take a course before any snow or glacier travel, and I'd rent the gear first. And if a stage is as far as you want to go, that's a good place to stop.
Have a question about “How to start mountaineering from zero: the path from a first hike to a first real summit and beyond”?
Ask it here. Every question comes to me first. I answer as many as I can, and each answered question goes on this page with my answer so other hikers and climbers can see it too. I don't ask for your email, so check back on this page for the answer.
More getting started guides
- US Centers for Disease Control and Prevention, checked October 16, 2026: adult physical activity guidelines (December 20, 2023) and the Yellow Book chapter on high altitude travel and altitude illness (April 23, 2025).
- US National Park Service, checked October 16, 2026: The Ten Essentials and Mount Rainier climbing.
- US National Weather Service, checked October 16, 2026: Lightning safety.
- US Forest Service, checked October 16, 2026: Mount Whitney, Inyo National Forest.
- 14ers.com, checked October 16, 2026: Easiest 14ers.
- Guide companies and schools, checked October 16, 2026: RMI Expeditions' Mount Rainier page and Rainier expedition experience (February 28, 2025), the American Alpine Institute's Seven Summits page, and The Mountaineers' scrambling course and Intensive Basic Alpine Climbing Course.
- Training plan, checked October 16, 2026: Uphill Athlete 8-week Beginner Mountain Fitness plan.
- Beginner guides, checked October 16, 2026: Mammut, how to start mountaineering in 6 simple steps (June 2024) and Life Happens Outdoors, the beginner's guide to mountaineering (updated August 24, 2026).
- Gear pages, checked October 16, 2026: Petzl's Tikkina, Actik Core, Meteor, Summit and Vasak, the La Sportiva Nepal EVO GTX, REI's Black Diamond Spot, Black Diamond Raven and Black Diamond Vapor, OutdoorGearLab's Trail Ergo Cork review and Outdoor Life's climbing helmet roundup.
- Videos: Train to Summit (January 2026) and Chad Lubinski (January 2023), checked October 16, 2026.
Everest Buddy is an independent site. No gear maker, store or guide company paid to be on this page. This guide gives general information, not medical advice, so see a doctor before you start a new training plan or travel to high altitude.